

Filters
Shopping Options
Marble Effect Tiles
Choose marble effect tiles to create a refined stone-inspired finish across interior walls and floors, with porcelain options suitable for bathrooms, kitchens, hallways and other living spaces. The range includes matt and polished finishes, square and rectangular formats, and rectified edges for a clean, accurate installation. Compare finish, size, veining and floor requirements to select the marble effect porcelain tiles that best suit the look and practical needs of your project.
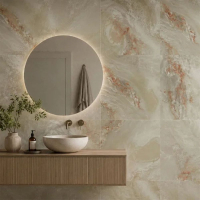 Pesto Verde Green Marble Effect Matt Porcelain Wall & Floor Tile 595 x 595mmFrom £0.00 £30.78 £26.01 / 1 m² Inc VAT From
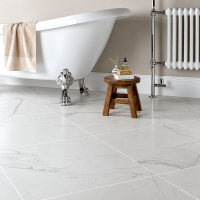 Calacuta White Marble Effect Polished Porcelain Wall & Floor Tile 600 x 600mmFrom £0.00 £28.81 £24.01 / 1 m² Inc VAT From
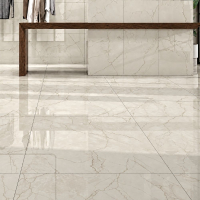 Galena Caryn Cream Marble Effect Polished Porcelain Wall & Floor Tile 1000 x 1000mmFrom £0.00 £72.66 £44.04 / 1 m² Inc VAT From
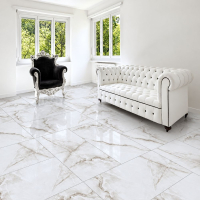 Onyx Grey Marble Effect Polished Porcelain Wall & Floor Tile 600 x 1200mmFrom £0.00 £31.22 £26.02 / 1 m² Inc VAT From
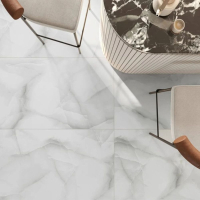 Opal White Marble Effect Matt Porcelain Wall & Floor Tile 600 x 1200mmFrom £0.00 £46.83 £26.02 / 1 m² Inc VAT From
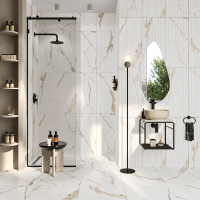 Pamena White Marble Effect Matt Porcelain Wall & Floor Tile 600 x 1200mmFrom £0.00 £50.45 £28.03 / 1 m² Inc VAT From
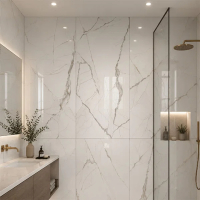 Pamena White Marble Effect Polished Porcelain Wall & Floor Tile 600 x 1200mmFrom £0.00 £50.45 £28.03 / 1 m² Inc VAT From
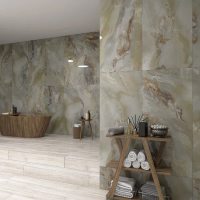 Pesto Verde Green Marble Effect Polished Porcelain Wall & Floor Tile 600 x 1200mmFrom £0.00 £57.68 £32.04 / 1 m² Inc VAT From
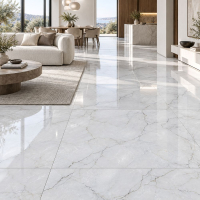 Galena Caryn White Marble Effect Satin Porcelain Wall & Floor Tile 1000 x 1000mmFrom £0.00 £62.34 £37.78 / 1 m² Inc VAT From
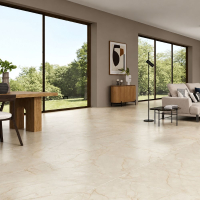 Galena Caryn Cream Marble Effect Satin Porcelain Wall & Floor Tile 1000 x 1000mmFrom £0.00 £62.34 £37.78 / 1 m² Inc VAT From
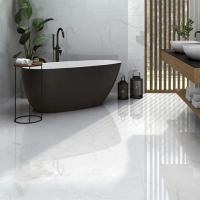 Galena Caryn White Marble Effect Polished Porcelain Wall & Floor Tile 1000 x 1000mmFrom £0.00 £72.66 £44.03 / 1 m² Inc VAT From
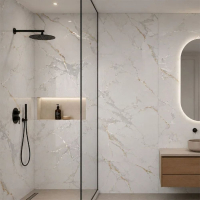 Genesis Staturio Carving White Marble Effect Matt Porcelain Wall & Floor Tile 600 x 1200mmFrom £0.00 £31.22 £26.02 / 1 m² Inc VAT From
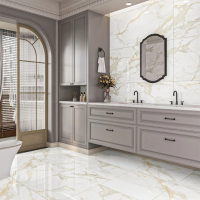 Genesis Staturio White Marble Effect Polished Porcelain Wall & Floor Tile 600 x 600mmFrom £0.00 £28.81 £24.01 / 1 m² Inc VAT From
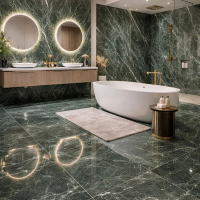 Green Marble Effect Polished Porcelain Wall & Floor Tile 600 x 1200mmFrom £0.00 £33.64 £28.03 / 1 m² Inc VAT From
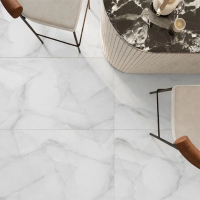 Opal White Marble Effect Polished Porcelain Wall & Floor Tile 600 x 1200mmFrom £0.00 £50.45 £28.03 / 1 m² Inc VAT From
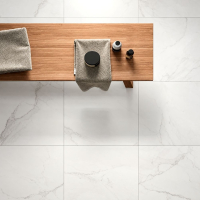 Calacuta White Marble Effect Matt Porcelain Wall & Floor Tile 600 x 600mmFrom £0.00 £28.81 £24.01 / 1 m² Inc VAT From
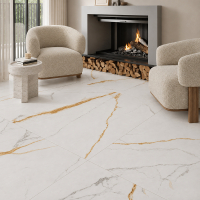 Golden Hour White Marble Effect Matt Porcelain Wall & Floor Tile 1200 x 1200mmFrom £0.00 £58.20 £48.50 / 1 m² Inc VAT From
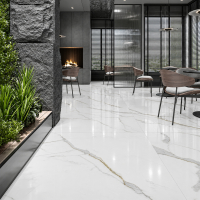 Calacatta Unique White Marble Effect Polished Porcelain Wall & Floor Tile 1200 x 1200mmFrom £0.00 £69.87 £58.23 / 1 m² Inc VAT From
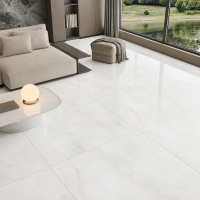 Onyx White Marble Effect Polished Porcelain Wall & Floor Tile 1200 x 1200mmFrom £0.00 £69.87 £58.23 / 1 m² Inc VAT From
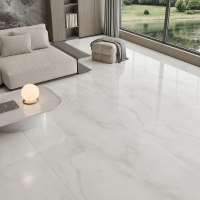 Onyx Grey Marble Effect Polished Porcelain Wall & Floor Tile 1200 x 1200mmFrom £0.00 £69.87 £58.23 / 1 m² Inc VAT From

Choosing Marble Effect Tiles for Walls, Floors & Feature Areas
Marble effect tiles bring the veining, tonal variation and refined appearance associated with natural marble into a practical porcelain format. The range is suitable for both wall and floor applications, making it possible to create coordinated schemes across bathrooms, kitchens, hallways and other interior spaces. When choosing between designs, consider the room as a whole: tile finish, format, lighting and floor requirements will all influence how the completed surface looks and performs. For marble effect bathroom tiles, pay particular attention to the stated floor suitability and slip-resistance information where the surface may become wet.
Matt vs Polished Marble Effect Tiles: Which Finish Suits the Space?
Surface finish has a major influence on the character of marble effect porcelain tiles. Polished tiles reflect more light and give the veining a sharper, higher-shine appearance, while matt finishes create a softer and less reflective look.
- Matt finish – Creates a calmer appearance with reduced surface reflection.
- Polished finish – Adds shine and makes veining and tonal contrast more prominent.
- Wall applications – Either finish can be used to create feature areas or coordinated schemes.
- Floor applications – Appearance should be considered alongside the tile's declared slip resistance and intended use.
The best choice depends on the atmosphere you want to create as well as the demands of the space, rather than simply choosing the finish with the strongest visual impact.
Large Format or Classic Square: Choosing the Right Tile Size
Tile shape and scale determine how the marble pattern flows across the finished surface. Square marble effect floor tiles create a balanced, structured layout, while rectangular formats introduce direction and can visually emphasise the length or height of a room. Larger tiles also create fewer grout joints, allowing the pattern to appear more continuous across broad areas.
The tiles in this category are rectified, providing accurately finished edges that support consistent alignment during installation. Large-format porcelain also requires a suitably flat and stable background, so Tile Backer Boards may be required where the existing substrate needs additional preparation.
Light, Veining & Colour: Choosing the Right Marble Effect Tiles
The appearance of marble effect wall tiles can change considerably under different lighting conditions. Bold veining produces stronger contrast and visual movement, while softer patterns create a quieter backdrop that can sit more subtly alongside furniture, cabinetry and sanitaryware.
Consider the tile together with the permanent finishes already in the room rather than choosing it in isolation. Lighter designs can help maintain a brighter overall scheme, while stronger tones and pronounced veins create greater definition. If you prefer a more natural rock-inspired appearance with less emphasis on marble veining, compare the Stone Effect Tiles range.
Complete the Installation with the Right Adhesive, Grout & Preparation
A successful installation depends on more than the tile itself. The substrate should be sound, stable and properly prepared, while the adhesive must suit the porcelain tile, surface and installation area. Browse Tile Adhesives when planning the fixing system for your marble effect wall and floor tiles.
Grout colour also changes how strongly the layout is defined. A shade close to the tile can make the joints less prominent, while contrasting grout places more emphasis on the individual tile format. Suitable spacers, cutting equipment and Tiling Accessories help maintain accurate positioning and clean detailing throughout the installation.
Choosing the right porcelain marble effect tiles ultimately comes down to balancing finish, size, veining and practical installation requirements so the completed surface works naturally within the space.
FAQs
How do marble effect tiles differ from other tile styles?
Marble effect tiles recreate the distinctive veining and tonal movement associated with natural marble. Their designs focus on flowing veins, contrasting lines and mineral-inspired patterns. This separates them visually from wood effect, concrete effect and other stone effect tile styles.
How do you cut marble effect porcelain tiles?
Use a tile cutter suitable for porcelain or a wet saw fitted with a porcelain-rated diamond blade. Measure and mark each cut carefully before placing the tile into the cutting equipment. Larger tiles should be properly supported to reduce the risk of chipping or breakage.
How do you clean marble effect porcelain tiles?
Remove loose dirt and grit before cleaning the tiled surface. Wash the tiles using warm water, a pH-neutral tile cleaner and a soft cloth or mop. Avoid abrasive pads and unsuitable cleaning chemicals that could mark or dull the surface finish.
Are marble effect porcelain tiles slippery?
Slip performance depends on the tile’s surface finish and declared slip-resistance rating. Matt and polished tiles can provide different levels of grip underfoot. Check the individual product rating carefully for bathrooms and other floors that may become wet.
Do marble effect porcelain tiles need sealing?
Porcelain tiles have very low water absorption and generally do not require sealing. Certain polished surfaces may have separate protection or maintenance requirements. Grout may also require sealing, depending on the selected grout type and installation area.