

Filters
Shopping Options
MDF Skirting Boards
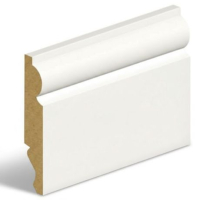
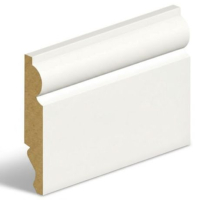
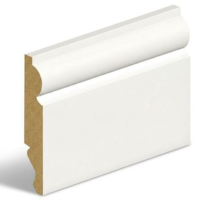
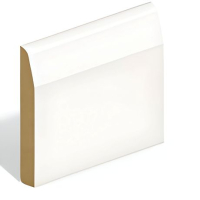
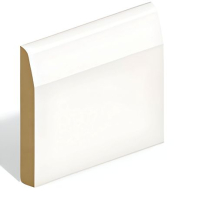
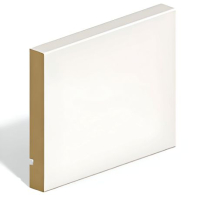
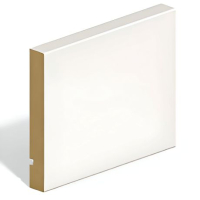
What Are Reversible Skirting Boards?
MDF skirting boards finish the joint between walls and flooring while covering expansion gaps and minor imperfections at floor level. Reversible boards provide two machined faces in one length, allowing installers to select torus or ogee, chamfer or pencil round, or square edge or grooved MDF skirting board profiles before fitting. The range uses 18mm moisture-resistant MDF, is supplied primed for interior use and includes 119mm, 144mm and 169mm heights in 4200mm lengths.
MDF Skirting Boards vs Polymer Skirting Boards
MDF provides a dense, consistent material that can be mitred, scribed and fixed with standard carpentry tools. MDF primed skirting boards are supplied ready for a decorative topcoat, making them suitable where the skirting colour must match walls, architraves or other painted joinery.
Polymer Skirting Boards use a different material construction and are supplied in shorter 2000mm lengths within the MGN range. Compare the required finish, board length, installation environment and amount of on-site cutting before choosing between the two materials.
MDF skirting boards prices also vary according to board height and profile, so compare products by their full 4200mm length and required coverage rather than unit price alone.
Cutting and Joining 4200mm Skirting Boards
Long boards reduce the number of joins across straight walls, but the room layout should be measured before cutting begins. Plan external mitres, internal scribes, door openings and unavoidable straight joints so short offcuts are not left in prominent positions.
When cutting:
- Support the board – Keep the full length level to prevent movement near the saw.
- Check the chosen face – Confirm which reversible profile will remain visible.
- Use a fine blade – A clean cut reduces breakout around moulded edges.
- Test internal corners – Walls are rarely perfectly square, so check each joint individually.
- Seal cut edges – Newly exposed MDF should be prepared before the final paint finish.
- Stagger joins – Keep straight joints away from corners and high-visibility areas where possible.
When sourcing MDF skirting boards UK-wide, consider delivery access and internal handling because 4200mm boards require adequate turning space through hallways, staircases and doorways.
Fixing MDF Skirting to Different Wall Types
The method used for fitting MDF skirting boards should match the wall condition and substrate. A suitable grab adhesive can provide a clean fixing to sound, reasonably even surfaces, while pins or nails can add restraint where suitable timber backing is available. The product information confirms that these boards can be installed using adhesive or mechanical fixings.
Before fixing, remove loose plaster, dust and high spots that could leave gaps behind the board. Do not expect adhesive to stabilise a weak wall surface, and check for concealed pipes or cables before using mechanical fixings.
- Masonry walls – Use a compatible adhesive or correctly selected masonry fixings where required.
- Plasterboard walls – Fix into studs or suitable backing when additional mechanical restraint is needed.
- Timber framing – Pins or nails can be driven into confirmed structural timber.
- Uneven walls – Scribe or pack carefully rather than forcing the board into a distorted line.
For coordinated door surrounds, choose a matching profile from the MDF Architrave range.
Preparing Primed MDF Skirting for Painting
White primed MDF skirting boards already have a factory-applied primer, but they still require inspection before the finish coat. Fill fixing holes and joints, sand repaired areas smooth and remove all dust before applying a compatible interior paint.
When painting MDF skirting boards, pay particular attention to mitres, scribes and cut ends because machining exposes unprimed material. Spot-prime these areas where required, then apply the finishing coats evenly with a brush, roller or spray system suited to the paint.
Moisture-resistant MDF improves stability in normal interior conditions, but it is not waterproof. Avoid leaving exposed edges in direct contact with standing water and follow the coating manufacturer’s drying and preparation instructions.
Square Edge vs Grooved Skirting Boards
Square-edge profiles create a plain, straight-lined finish that suits simple interiors and reduces detailed moulding around the room. Grooved profiles retain the same clean overall shape but add a recessed line for extra definition.
The reversible square edge and grooved boards are available in 119mm and 144mm heights, both with an 18mm thickness and 4200mm length. Choose the profile before cutting, then keep the selected face consistent across every board and adjoining room.
- Square edge – Easier to integrate with minimalist joinery and plain architraves.
- Grooved – Adds controlled detailing without using a traditional curved moulding.
- 119mm height – Provides a lower finished line for standard wall proportions.
- 144mm height – Covers more of the lower wall and creates a taller visual border.
- Matching joinery – Coordinate the chosen profile with door surrounds and other painted mouldings.
FAQs
What is MDF skirting board?
MDF skirting boards are manufactured panels used to finish the joint between internal walls and flooring. They cover expansion gaps, protect the lower wall and provide a consistent surface for painting. Available profiles, heights and reversible designs allow the skirting to match different interior finishes.
How do you paint MDF skirting boards?
Fill fixing holes and joints, lightly sand repaired areas and remove all dust before painting. Spot-prime cut ends or exposed MDF, even when the visible faces are already factory primed. Apply compatible finishing coats evenly and allow the stated drying time between coats.
How do you fit MDF skirting boards?
Measure each wall, plan the joints and cut the boards using mitres for external corners and scribes for internal corners. Fix them with a suitable grab adhesive, mechanical fixings or both, depending on the wall condition and available backing. Check alignment before the adhesive cures and confirm that no concealed pipes or cables are at risk.
What paint should you use on MDF skirting boards?
Use a durable interior trim paint that is compatible with the existing primer, such as a suitable satin, eggshell or gloss finish. Newly cut edges may absorb paint differently and should be sealed or spot-primed first. Follow the coating manufacturer’s preparation and recoat instructions to prevent uneven adhesion or sheen.
Which is better for skirting boards: MDF or wood?
MDF provides a smooth, consistent surface that suits painted finishes and detailed machined profiles. Natural timber is easier to stain, displays real grain and may be preferable where a wood finish is required. The better option depends on the desired appearance, moisture exposure, installation method and maintenance expectations.
How do you glue MDF skirting boards?
Apply a compatible grab adhesive in controlled beads to the back of the board after cleaning the wall surface. Press the skirting firmly into position and use temporary pins or supports where needed while the adhesive cures. Do not rely on adhesive over loose plaster, dust or unstable finishes that cannot support the bond.
How do you repair MDF skirting board?
Small dents, fixing holes and open joints can usually be filled, sanded, primed and repainted. Swollen or crumbling MDF caused by moisture normally requires the damaged section to be cut out and replaced. Identify and correct the source of moisture before repairing the finish to prevent the damage from returning.