

Filters
Shopping Options
MDF Architrave
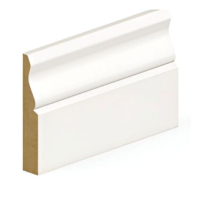
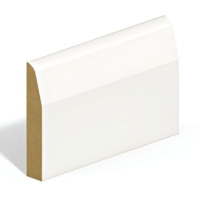
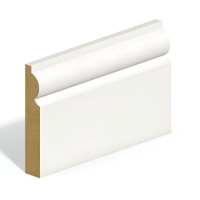
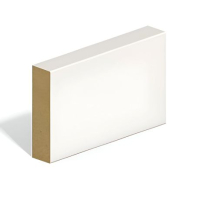
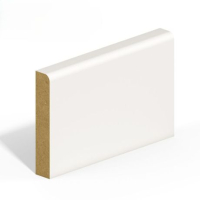
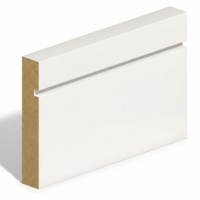
Choosing MDF Architraves for Internal Door Frames
MDF architraves cover the joint between an internal door lining and the surrounding wall finish, creating a consistent border around the opening. The listed MDF architrave profiles are supplied white primed in an 18 × 69 × 4200mm format, with moisture-resistant MDF construction for interior joinery applications. Choose the profile according to the adjoining trim, required frame coverage and room style, while allowing enough material for both upright legs, the head and cutting waste.
Preparing Primed MDF Architraves for Painting
The MDF primed architrave profiles have a factory-applied base coat that reduces initial preparation before decorating. The visible surfaces should still be inspected for handling marks, raised fibres or contamination, particularly where satin, eggshell or gloss paint will be used.
Complete the cutting and fitting before painting MDF architraves so the mitres, fixing holes and small gaps can be prepared together. Machined ends expose unprimed MDF, which may absorb paint differently from the factory-coated face and require sealing or spot priming.
Prepare the installed mouldings by:
- Fill fixings – Use a compatible filler for pin holes and minor surface damage.
- Inspect mitres – Fill fine gaps without changing the shape of the moulded detail.
- Sand repairs – Smooth filled areas without removing unnecessary factory primer.
- Seal cut ends – Spot-prime exposed MDF where required before applying topcoats.
- Remove dust – Clean the surface thoroughly to support consistent paint adhesion.
- Follow drying times – Apply each coat according to the paint manufacturer’s instructions.
Moisture-resistant MDF is not waterproof. Correct persistent damp or water exposure before installing or decorating the architrave.
Cutting and Joining 4200mm MDF Architraves
When comparing MDF architrave sizes, the products in this category use an 18 × 69 × 4200mm format. The long lengths can provide complete upright legs and heads with fewer unnecessary joints, but delivery access and internal handling space should be checked before ordering.
Measure both upright legs and the head of every opening, then include additional length for mitres, damaged ends and cutting waste. Establish a consistent reveal around the door lining before marking the boards, and check each corner individually because walls and frames may not be perfectly square.
For accurate cutting and joining:
- Support the length – Keep the full board stable and level while cutting.
- Use a fine blade – Reduce breakout around detailed or rounded mouldings.
- Mark the face – Keep the visible profile orientation consistent around each opening.
- Check cut edges – Inspect for breakout or damage before assembling the joints.
- Test mitres dry – Confirm the fit before applying adhesive or permanent fixings.
- Allow for waste – Include offcuts and correction cuts when calculating quantities.
Avoid using large amounts of filler to disguise inaccurate cuts. Recutting a poor joint normally gives a stronger and more consistent finish.
Fixing MDF Architraves to Door Linings and Walls
Architrave is positioned over the junction between the door lining and finished wall, with an even reveal left around the lining edge. Mark this margin before cutting so the head and both legs remain aligned around the opening.
Mechanical fixings can secure the moulding to sound timber within the lining. A compatible grab adhesive can supplement these fixings where both surfaces are clean, stable and properly prepared, but it should not be applied over loose plaster, dust or flaking coatings.
Before fitting around Standard Internal Doors, check:
- Lining position – Confirm the frame is secure, plumb and correctly set.
- Reveal width – Mark an even margin around both legs and the head.
- Wall condition – Remove loose material that could weaken the adhesive bond.
- Fixing points – Drive pins or nails into sound timber rather than weak edges.
- Surface alignment – Scribe or pack where the wall projects beyond the lining.
- Hidden services – Check for cables and pipes before using longer fixings.
Fix the head and legs without pulling the moulding out of shape. Recheck the mitres and reveal before the adhesive cures or the final fixings are driven home.
Matching MDF Architraves with Skirting Boards
Coordinating MDF architraves and skirtings creates a consistent transition between door openings and the lower wall finish. Matching the material thickness and profile family helps the mouldings meet neatly where the skirting terminates against each side of the doorway.
For a coordinated painted finish, compare the architrave with compatible MDF skirting boards. The skirting height does not need to match the architrave width, but the profile detail and thickness should form a deliberate junction rather than an uneven step.
Check the following before ordering:
- Profile shape – Pair traditional curves or simple straight edges consistently.
- Material thickness – Avoid an unplanned projection where the mouldings meet.
- Finished colour – Use compatible coatings when both elements will be painted together.
- Floor level – Measure skirting positions from the completed flooring surface.
- Door layout – Calculate left- and right-hand junctions across the full project.
Square Edge, Grooved and Chamfer & Round Profiles
Among the available MDF architrave mouldings, square edge, grooved and chamfer-and-round options provide three clearly different finishing styles without changing the board format. The profile affects the visible detail around the doorway rather than the general cutting and fixing method.
- Square edge – Creates a plain border with straight lines for simple modern joinery.
- Grooved – Adds a recessed linear detail while retaining a mainly flat appearance.
- Chamfer and round – Combines an angled face with a softened edge for understated shaping.
Square edge works well where the surrounding trim is deliberately minimal. Grooved architrave introduces extra definition without a deep traditional moulding, while chamfer and round provides a softer transition that remains straightforward to paint and finish.
Select the profile before cutting and keep its orientation consistent around every opening. Where connected rooms share the same joinery scheme, maintaining one profile can produce a more coordinated finish.
FAQs
How do you attach MDF architrave?
MDF architrave can be attached with suitable grab adhesive, finishing nails or a combination of both. Mark an even reveal around the door lining, apply adhesive to clean surfaces and secure the moulding until the bond sets. Check the wall for loose plaster, pipes and cables before using mechanical fixings.
Can you nail MDF architrave?
Yes, MDF architrave can be nailed to a sound timber door lining using suitable finishing nails or pins. Keep the fixings away from cut edges, drive them slightly below the surface and fill the holes before painting. Avoid forcing oversized nails into the board because this may split or damage the profile.
How do you cut MDF architrave for mitred corners?
Mark the required length and cut adjoining pieces at matching 45-degree angles using a mitre saw or mitre box. Support the full board, use a fine-tooth blade and test the joint before applying adhesive or fixings. Check each corner individually because door linings and walls are not always perfectly square.
Does primed MDF architrave need sanding before painting?
Primed MDF architrave normally needs only light sanding where the surface has handling marks, raised fibres or filled fixing holes. Remove all dust and spot-prime exposed cut ends before applying the finishing coats. Do not sand aggressively because this can remove the factory primer and leave an uneven surface.
What size MDF architrave should I use for an internal door?
Choose an MDF architrave size that covers the joint between the door lining and wall while leaving a consistent visible reveal. Consider the width of the existing trim, the wall condition and how the architrave will meet the skirting. Measure every opening before ordering because wider mouldings may interfere with nearby walls, switches or adjoining door frames.
Should MDF architrave match the skirting boards?
MDF architrave does not have to match the skirting exactly, but coordinated profiles and thicknesses usually create a more consistent finish. Check how both mouldings meet beside each doorway and avoid an unintended step between their front faces. Different styles can be combined where the change is deliberate and suits the wider interior design.