

Filters
Shopping Options
Timber Fence Posts
Timber fence posts provide a practical support system for fence panels, rails and other garden boundary components. Available in different sections and lengths, they should be selected according to the fence height, fixing arrangement and installation method. Pressure treatment improves outdoor durability, while correct setting, drainage and compatible fixings help support long-term performance.
Choosing Timber Fence Posts for Garden Boundaries
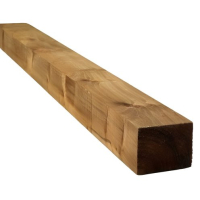
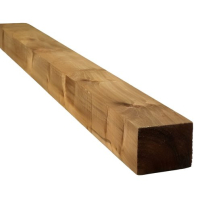
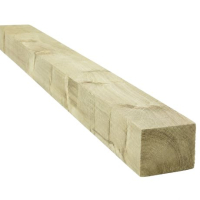
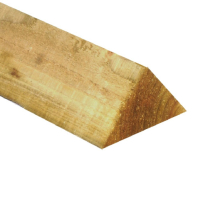
Timber fence posts provide a practical framework for supporting fence panels, rails and other compatible fencing components. MGN’s range includes pressure-treated square sections in different sizes and lengths, allowing the posts to be matched to the fence design, finished height and fixing arrangement. Before ordering wooden posts for fencing, measure the complete boundary and identify corners, changes in ground level, panel widths and any openings requiring separately specified supports.
Choosing Between 2.4m and 3.0m Fence Posts
Post length should be selected by adding the required height above finished ground to the length needed below ground or inside the chosen support system. A 2.4m post may suit many standard garden boundaries, while a 3.0m option provides additional length for taller fencing or installation arrangements requiring more post below ground. Availability varies by section, so check the selected product rather than assuming every size comes in both lengths.
The post section also affects the available fixing face. 100mm wooden fence posts provide a 100 × 100mm square section, offering more space for panel brackets, rails and exterior fixings than narrower alternatives. Select the section according to the fence design and project specification rather than assuming that the largest post is necessary for every boundary.
Before ordering, confirm:
- Finished height – Measure from the completed ground level to the required post top.
- Installation allowance – Include the length below ground or within the selected support.
- Post section – Match the fixing face to the panel, rail or bracket arrangement.
- Sloping ground – Measure individual positions where the fence will step.
- Openings – Plan gates and other load-bearing positions separately.
- Cutting allowance – Avoid excessive trimming caused by inaccurate measurements.
How Pressure Treatment Protects Timber Fence Posts
Treated timber fence posts contain preservative intended to improve resistance to fungal decay, rot and insect attack during external use. This protection helps timber perform more reliably outdoors, but treatment does not make it waterproof or remove the need for sound installation, suitable fixings and routine inspection. Newly exposed cut ends should also be protected in accordance with the treatment guidance.
The treatment class must be suitable for the intended exposure. This is particularly important when pressure treated fence posts will be installed in direct contact with soil, because an external-use or treated description alone does not confirm suitability for permanent ground contact. Verify the stated treatment or Use Class before choosing the foundation method.
To preserve the timber:
- Use exterior fixings compatible with treated wood.
- Protect cut ends where required.
- Avoid details that trap water around the post.
- Inspect the ground line for splitting or decay.
- Replace loose fixings before movement damages the timber.
Setting Wooden Fence Posts at the Correct Depth
There is no single installation depth suitable for every fence. Required embedment depends on the fence height, soil stability, wind exposure, post spacing and foundation design, so the complete arrangement should be assessed before excavation begins. The confirmed treatment class must also suit direct ground contact where the post will be buried.
When positioning wooden fence posts, establish the fence line from finished ground level and use a string line to control alignment. Check each post for plumb on two adjacent faces, brace it securely and avoid loading it with panels until the foundation can hold the post without movement.
Check each position for:
- Soil stability – Loose or waterlogged ground may need a revised foundation.
- Fence alignment – Keep the posts on the established boundary line.
- Post height – Follow a level or deliberately stepped arrangement.
- Drainage – Avoid creating a detail that retains water against the timber.
- Underground services – Confirm the route is safe before digging.
- Treatment suitability – Verify the required exposure class before burial.
Timber Fence Posts vs Concrete Fence Posts: Which Should You Use?
Timber posts are lighter, easier to cut and simpler to drill or screw into than concrete alternatives. They work particularly well with face-fixed panels, rails and brackets where the fixing positions may need adjustment during installation. They can also be painted or stained to coordinate with the surrounding fence.
Concrete fence posts do not suffer timber decay and generally require less maintenance at ground level. However, they are heavier, more difficult to modify and normally used with compatible slotted fencing components.
Consider the practical differences:
- Handling – Timber is easier to move through restricted access.
- Fixing – Panels and rails can be secured directly with suitable exterior fixings.
- Adjustment – Timber can be trimmed more easily on site.
- Ground exposure – Concrete is not vulnerable to rot.
- Maintenance – Timber requires periodic condition checks.
- Appearance – Timber can be decorated to match the fence.
Choose timber where fixing flexibility and easier handling matter most, or concrete where reduced ground-level maintenance is the priority.
Fixing Fence Panels Securely to Timber Posts
Install panels only after the posts are aligned, securely founded and able to remain stable under load. Set post centres from the actual panel width and chosen fixing arrangement, as inaccurate spacing can pull panels out of square or leave uneven gaps.
Support the panel at the intended height and use exterior-grade brackets or fixings suitable for treated timber. Keep screws away from split edges, drill pilot holes where necessary and leave appropriate clearance between the panel and ground to reduce prolonged moisture exposure.
A reliable sequence is:
- Set and brace the first post.
- Measure the actual fence panel.
- Position and secure the adjoining post.
- Support the panel at the required height.
- Check its level and side clearances.
- Tighten the fixings without distorting the panel.
Check every completed bay before continuing so that small spacing or alignment errors are not repeated along the full fence run.
FAQs
How long do wooden fence posts last?
There is no fixed lifespan because performance depends on the treatment level, timber condition, ground contact, drainage and exposure. Posts installed permanently in soil should be verified as suitable for Use Class 4 conditions rather than assumed suitable because they are pressure treated. Regularly inspect the ground line for softness, cracking or movement so deteriorating posts can be repaired or replaced early.
How do you put up a fence with wooden posts?
Mark the boundary, locate underground services and set the post positions from the actual panel or rail dimensions. Install the end and corner posts first, align the remaining positions with a string line, then secure each post plumb before attaching the fencing. Allow the foundations to gain sufficient strength and use exterior-grade fixings suitable for treated timber.
How do you install wooden fence posts?
Confirm that the timber treatment suits the chosen installation method, particularly when the posts will contact soil. Excavate suitable holes, position each post at the required height and brace it vertically while the foundation material is placed. Prevent water from collecting around the ground line and do not load the posts until the foundations are stable.
How long do wooden fence posts last in concrete?
Setting wooden posts in concrete does not provide a guaranteed lifespan because moisture can still affect the timber around the ground line. Durability depends on suitable ground-contact treatment, drainage, installation quality and whether cuts or damage have exposed untreated wood. Use posts verified for Use Class 4 conditions and form the foundation so surface water drains away from the timber.
How do you stop wooden fence posts rotting?
Choose timber with a verified Use Class suitable for direct ground contact, or keep the wood above soil using a compatible post-support system. Protect newly cut surfaces as required and avoid installation details that trap water against the post. Inspect the ground line regularly and address loose fixings, splits or drainage problems before decay becomes extensive.
How do you strengthen wooden fence posts?
First determine whether movement is caused by a loose foundation, damaged timber, excessive loading or an undersized post. A structurally sound post may be stabilised with a suitable brace or repair support, but significantly rotten or split posts should be replaced. Gates, tall fences and exposed boundaries may require separately specified posts and foundations rather than additional screws or improvised packing.