

Filters
Shopping Options
Bar Clamps
Shop bar clamps at MGN Builders Merchants for holding workpieces securely during woodworking, fitting and assembly. Choose from 150mm and 300mm clamps with quick-release adjustment and protective jaw pads. Each clamp can also be converted into a spreader for holding components apart during positioning and assembly.
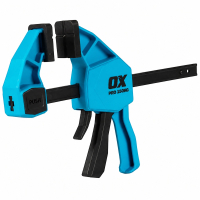

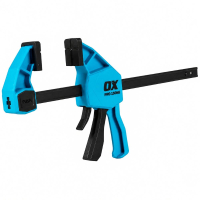
Bar Clamps for Woodworking and Assembly
Bar clamps keep timber and components in position while you drill, glue or add fixings. They can hold two pieces together or secure a piece to a bench, leaving your hands free for the next step.
For woodworking and fitting jobs, think about where the jaws will grip and whether the handle or bar could obstruct your tools. A clamp that fits around the work still needs enough clearance for you to drill or drive a screw.
Line up the parts before tightening. Use suitable measuring and layout tools to check dimensions and square corners, then check again once the clamp is holding them firmly.
Choosing the Right Jaw Opening
Measure the full distance the jaws need to span, including any bench edge or protective packing. The opening must accommodate everything you intend to clamp together.
- For smaller pieces: the OX Pro 150mm bar clamp takes up less space where a short opening is enough.
- For wider assemblies: the OX Pro 300mm bar clamp reaches around work that needs a larger opening.
- For gripping further from an edge: jaw reach matters too. The pads need to reach the holding point while the bar clears the material.
The 150mm and 300mm figures describe the maximum jaw opening. Both models have a stated clamping force of up to 150kg, so the larger opening gives you more capacity for wider work.
Quick-Release Control While Positioning Parts
One-handed clamps are useful when you need to steady a loose piece as you secure it. Squeezing the trigger brings the jaws together, and the quick release lets you loosen the grip when something needs adjusting.
Bring the pads into contact first, check that the pieces line up, then tighten gradually. Quick-release clamps make it easier to reposition parts during assembly, but tightening can still pull them out of alignment. Longer assemblies may need several clamps to hold them evenly.
Make cutting and fixing marks with suitable marking tools before securing the work. Position the jaws so the marks remain visible and the clamp stays clear of your cutting or drilling path.
Using the Spreader Function and Protecting Surfaces
The OX models here can also hold parts apart when converted to spreaders. Follow the conversion instructions and check the spreading range for the gap you need to work across.
When using woodworking clamps on soft timber or finished surfaces, a little care helps avoid dents and scratches:
- Keep the jaw pads clean: grit and dried glue can leave marks.
- Add protective packing where needed: a clean scrap of timber can spread contact over a larger area.
- Apply pressure gradually: stop and adjust if the pieces move or begin to distort.
- For glued joints: follow the adhesive manufacturer’s clamping pressure and time.
Protective pads help reduce marking, but they cannot prevent every dent. Use enough pressure to hold the parts securely without crushing or bending them.
FAQs
Can I use a longer bar clamp on a smaller workpiece?
Yes, as long as the jaws close far enough and the pads sit securely on the material. A 300mm bar clamp can hold smaller pieces as well as wider assemblies. Check that the extra bar length won’t get in the way while you work.
How many clamps do I need for woodworking?
You need enough clamps to keep the pieces aligned and the joint closed as you tighten. If the work turns or shifts around one clamp, add another to steady it. For a long glued joint, spread the clamps along its length so pressure isn’t concentrated at one point.
How long should I leave wood clamped after gluing?
Use the clamping time given for your adhesive, taking account of the temperature and any instructions for the type of joint. The glue may need more time to cure after the clamps come off. Check when the joint can be handled or put under load before continuing with the work.
Why does my bar clamp keep slipping?
First, check that the pads sit flat and the work is properly supported. Oil, dirt or dried glue on the rail can affect the grip, so remove residue using the cleaning method recommended for your clamp. If it still slips, check for worn or damaged parts rather than trying to solve it by tightening harder.
How should I store bar clamps?
Wipe off glue, dust and moisture before putting the clamps away somewhere dry. Use a rack or secure shelf where the bars, handles and jaw pads won’t be knocked or crushed by other tools. Remove residue before it builds up around the sliding jaw or release mechanism.